1 2 3 4 5 6 7 8 9 10 11 12 13 14 15 16 |
#include <Armstrong.h> void setup(){ Armstrong.begin(); } void loop(){ for(uint8_t i = 0; i <= 4; i++){ LED.set((Slot)i, true); } delay(500); for(uint8_t i = 0; i <= 4; i++){ LED.set((Slot)i, false); } delay(500); } |


1 2 3 4 5 6 7 8 9 10 11 12 13 14 15 16 17 18 19 20 |
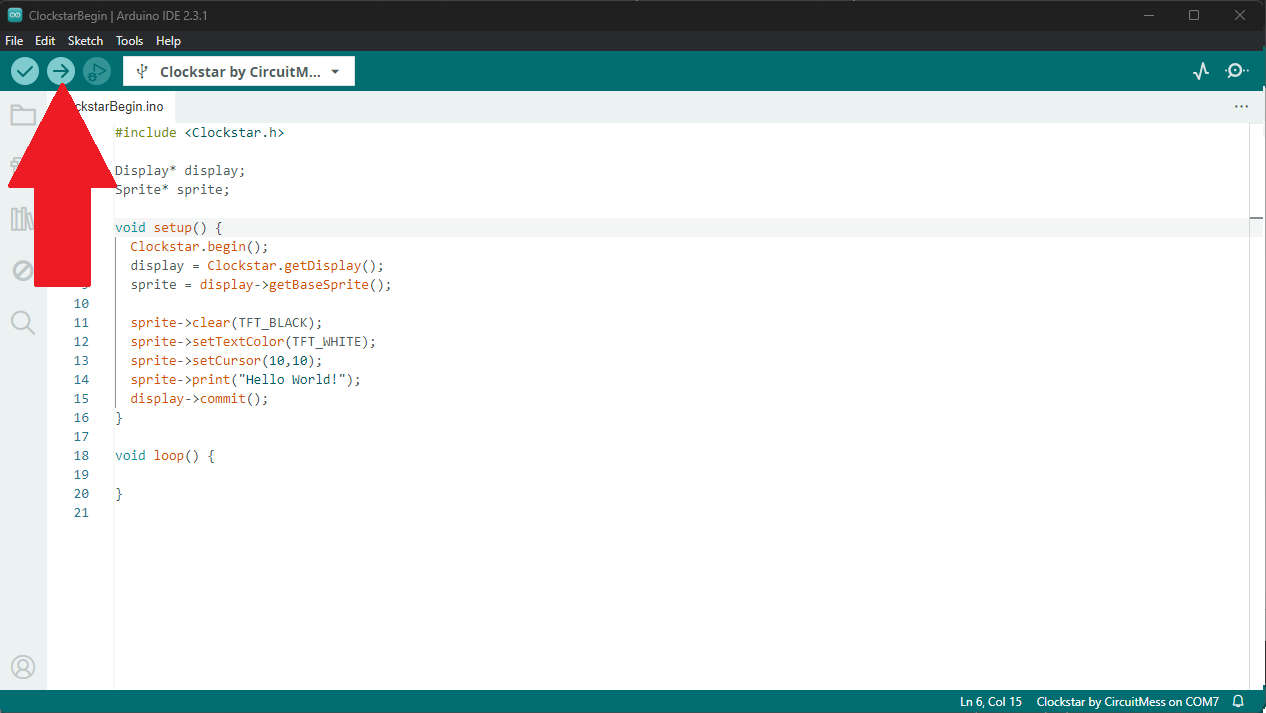
#include <Clockstar.h> Display* display; Sprite* sprite; void setup() { Clockstar.begin(); display = Clockstar.getDisplay(); sprite = display->getBaseSprite(); sprite->clear(TFT_BLACK); sprite->setTextColor(TFT_WHITE); sprite->setCursor(10,10); sprite->print("Hello World!"); display->commit(); } void loop() { } |


1 2 3 4 5 6 7 8 9 10 11 12 13 14 15 16 17 18 19 |
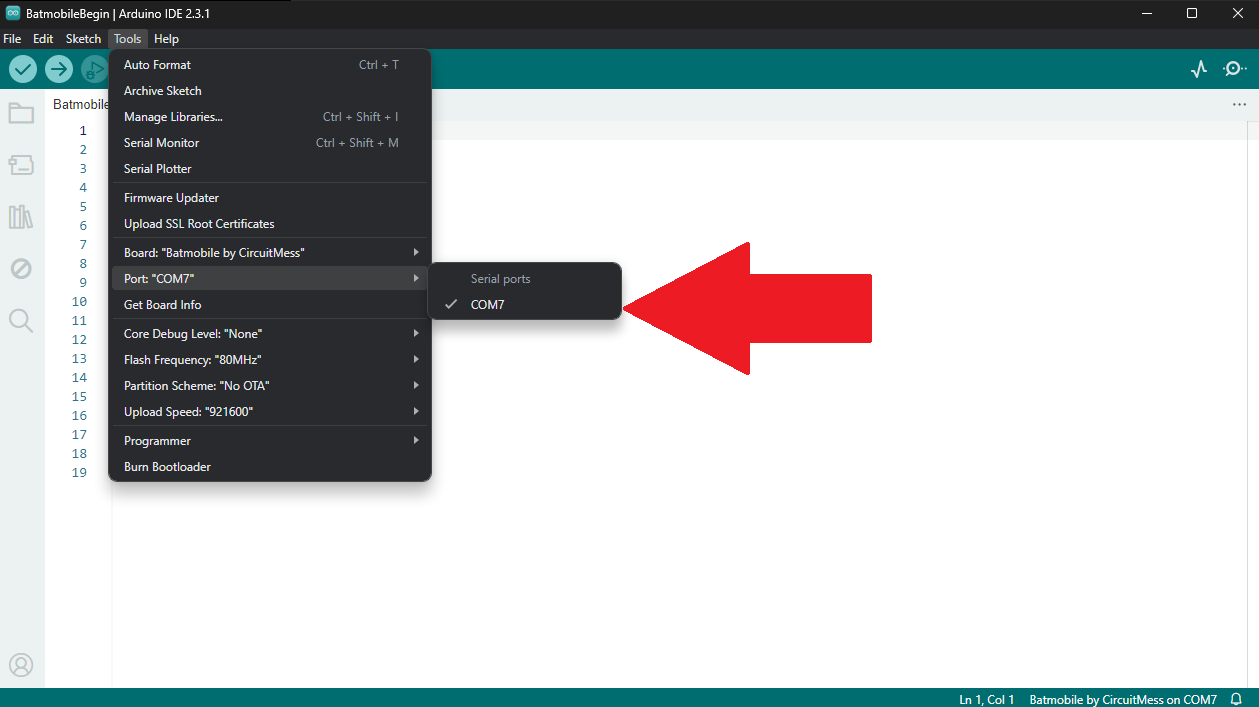
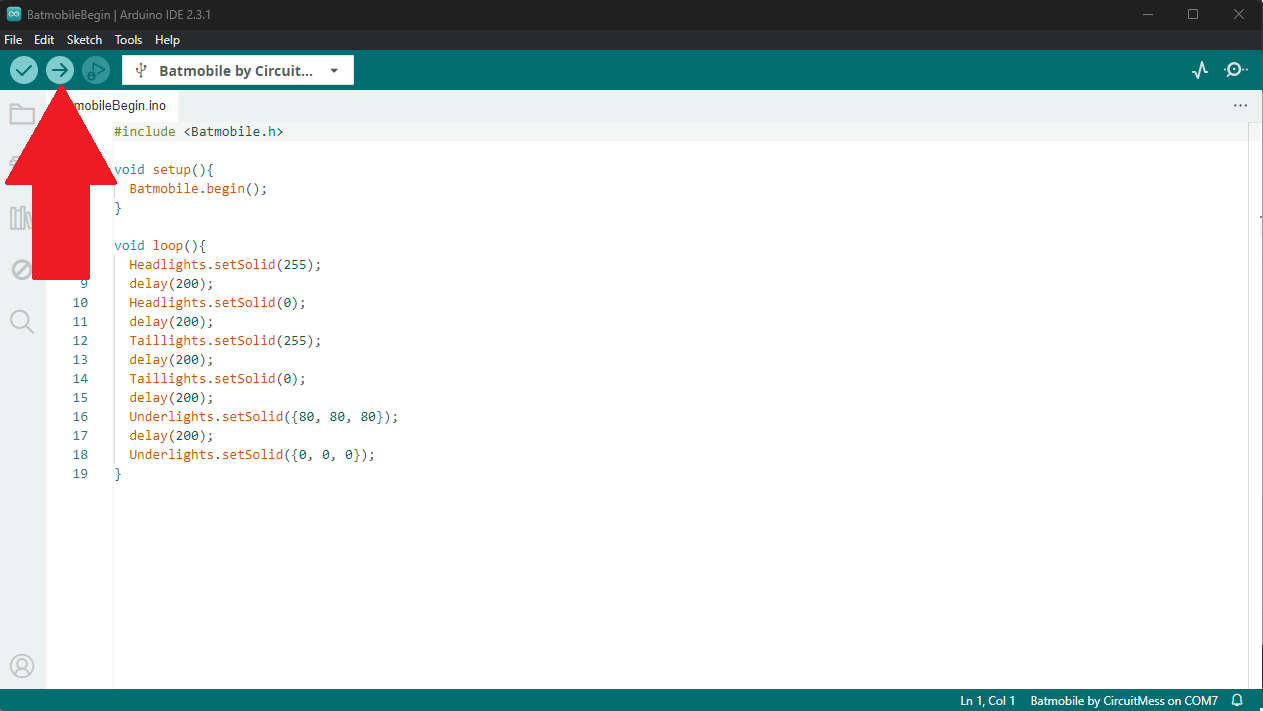
#include <Batmobile.h> void setup(){ Batmobile.begin(); } void loop(){ Headlights.setSolid(255); delay(200); Headlights.setSolid(0); delay(200); Taillights.setSolid(255); delay(200); Taillights.setSolid(0); delay(200); Underlights.setSolid({80, 80, 80}); delay(200); Underlights.setSolid({0, 0, 0}); } |

1 2 3 4 5 6 7 8 9 10 11 12 13 14 15 16 17 18 19 20 21 22 |
#include <BatController.h> Display* display; Sprite* sprite; void setup() { BatController.begin(); display = BatController.getDisplay(); sprite = display->getBaseSprite(); sprite->clear(TFT_BLACK); sprite->setTextColor(TFT_WHITE); sprite->setTextFont(2); sprite->setCursor(0,0); sprite->print("Hello World!"); display->commit(); } void loop() { } |


1 2 3 4 5 6 7 8 9 10 11 12 13 14 15 16 17 18 19 20 21 |
#include <CircuitPet.h> Display* display; Sprite* sprite; void setup() { CircuitPet.begin(); display = CircuitPet.getDisplay(); sprite = display->getBaseSprite(); sprite->clear(TFT_BLACK); sprite->setTextColor(TFT_WHITE); sprite->setTextFont(2); sprite->setCursor(0,0); sprite->print("Hello World!"); display->commit(); } void loop() { LoopManager::loop(); } |


1 2 3 4 5 6 7 8 9 10 11 12 13 14 15 16 17 18 |
#include <Synthia.h> #include <Loop/LoopManager.h> void setup() { Synthia.begin(); Matrix& matrix = Synthia.TrackMatrix; matrix.clear(); matrix.setFont(Matrix::SMALL); matrix.drawString(0, 5, "HEY"); matrix.push(); } void loop() { } |


1 2 3 4 5 6 7 8 9 10 11 12 13 14 15 16 17 18 19 20 21 |
#include <Chatter2.h> Display* display; Sprite* sprite; void setup() { Chatter.begin(); display = Chatter.getDisplay(); sprite = display->getBaseSprite(); sprite->clear(TFT_BLACK); sprite->setTextColor(TFT_WHITE); sprite->setTextFont(2); sprite->setCursor(0,0); sprite->print("Hello World!"); display->commit(); } void loop() { LoopManager::loop(); } |


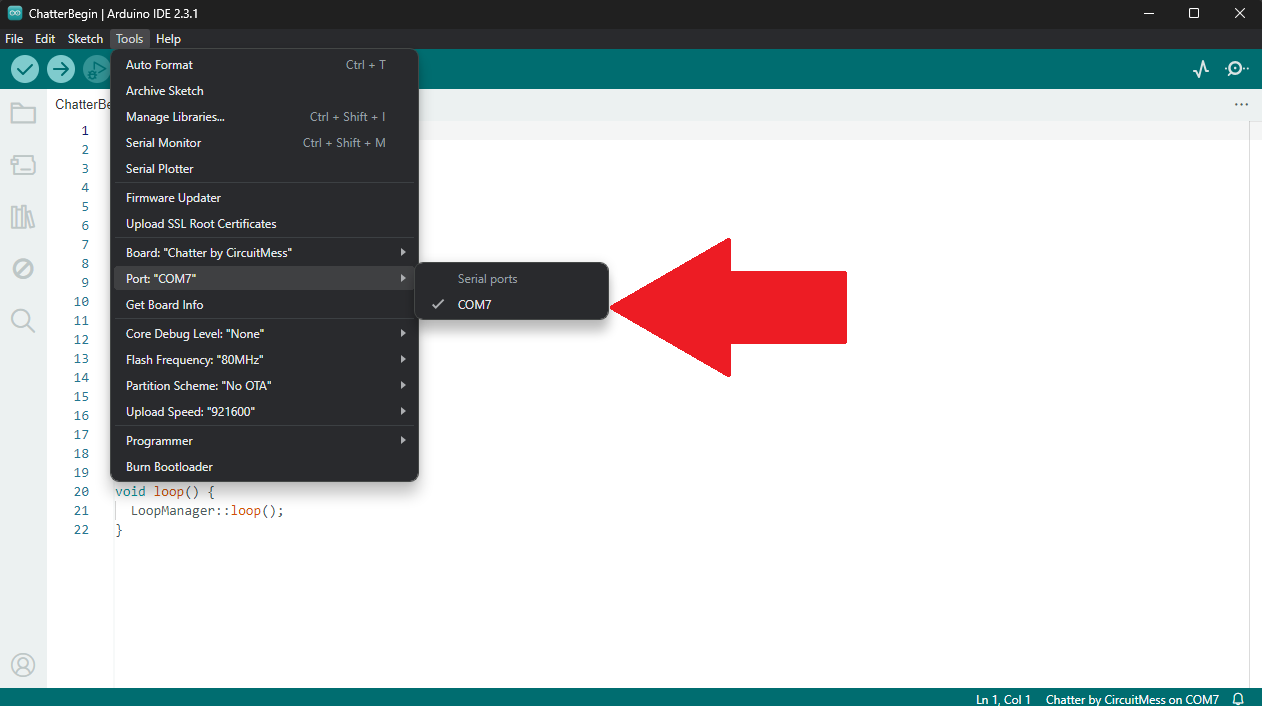
1 2 3 4 5 6 7 8 9 10 11 12 13 14 15 16 17 18 19 20 21 22 |
#include <Chatter.h> Display* display; Sprite* sprite; void setup() { Chatter.begin(); display = Chatter.getDisplay(); sprite = display->getBaseSprite(); sprite->clear(TFT_BLACK); sprite->setTextColor(TFT_WHITE); sprite->setTextFont(2); sprite->setCursor(0,0); sprite->print("Hello World!"); display->commit(); } void loop() { LoopManager::loop(); } |