Buzzzzzer
Let's learn what to do with the Piezo buzzer you soldered onto your Chatter.
As the word itself says, the buzzer is used for making buzzing sounds.
We'll make a very similar sketch to the last one, but this time, pressing the buttons will trigger a particular sound to come out of the buzzer.
Let's start!
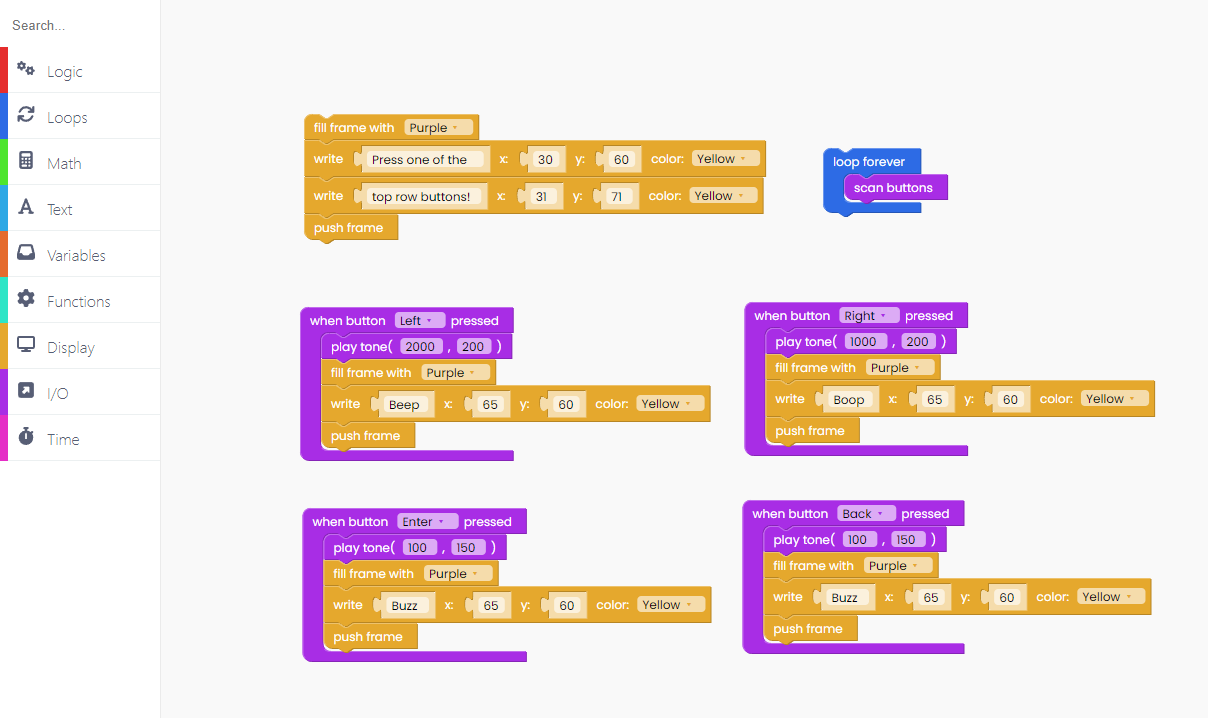
Let's start by coding what will happen when we run the code.
We want the instructions to appear on the screen.
We'll use the same code as in the last example.

So we want the display to turn purple and show the message "Press one of the top row buttons!".
Now let's see what happens with the buzzer when a certain button gets pressed.
Like in the previous sketch, we'll use I/O blocks to identify what happens when specific buttons are pressed.

Let's introduce you to a new block called "Play tone (2000, 200)".
The first number represents the frequency, while the second number determines how long the tone will play.
Aside from that, we want the screen to change color and to write what sound the buzzer makes.
That will be "Beep" for the first one.
This is what your code should look like by now:

Let's duplicate the I/O block and see what happens when the right button is pressed.

Duplicate it once more for the enter.

And, for the back button.

As noted in a previous example, you must include the "loop forever" and "scan buttons" blocks at the end of any code involving buttons.
Your code is ready!
Click on the Run button and check it out.