Harald Guide ENG
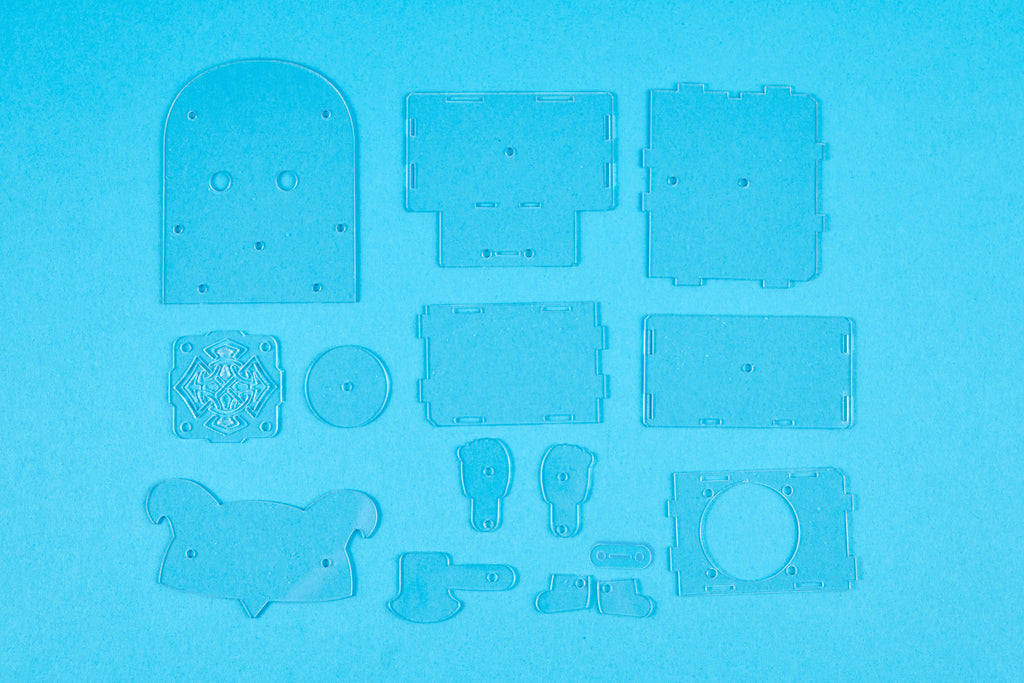
What's in the box?

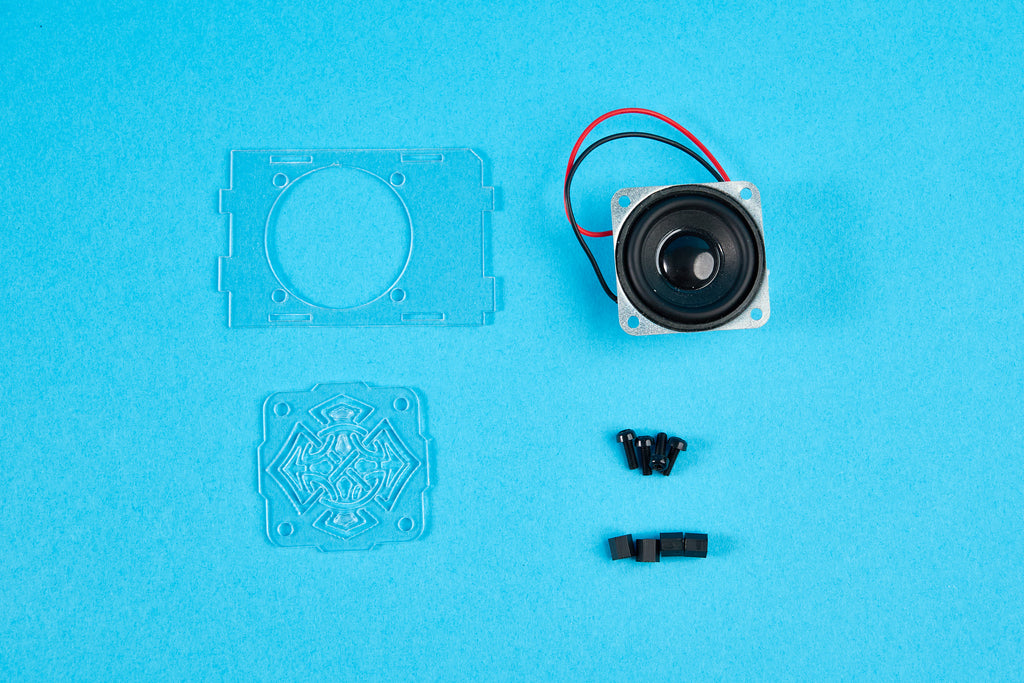
- Speakers
- Metal screws
- Screwdriver
- Large plastic bolts
- Small plastic bolts
- Medium plastic bolts
- Plastic standoffs
- Medium standoffs
- Nuts
- Long standoffs
- Token
- LEDs
- Rubber feet
- Batteries
- Battery holder
- USB–C cable
- PCB
- Plexiglass parts
Welcome to the Harald build guide!
Follow these instructions to assemble
your Harald robot step–by–step.
First things first, let’s get your acrylic casings ready.
Carefully peel off the protective foil from both
sides of each casing so they are clear and shiny.

Wow, look how
shiny they are now!
Now let’s dive into the exciting assembly part!
The first components you’ll need are a
speaker, two acrylic casings (see photo), four
spacers, and four medium–sized bolts.
Put the casing with the interesting
cut–out part on the second casing,
as shown in the photo below.

Next, add the speaker from the
inner side of the casing.


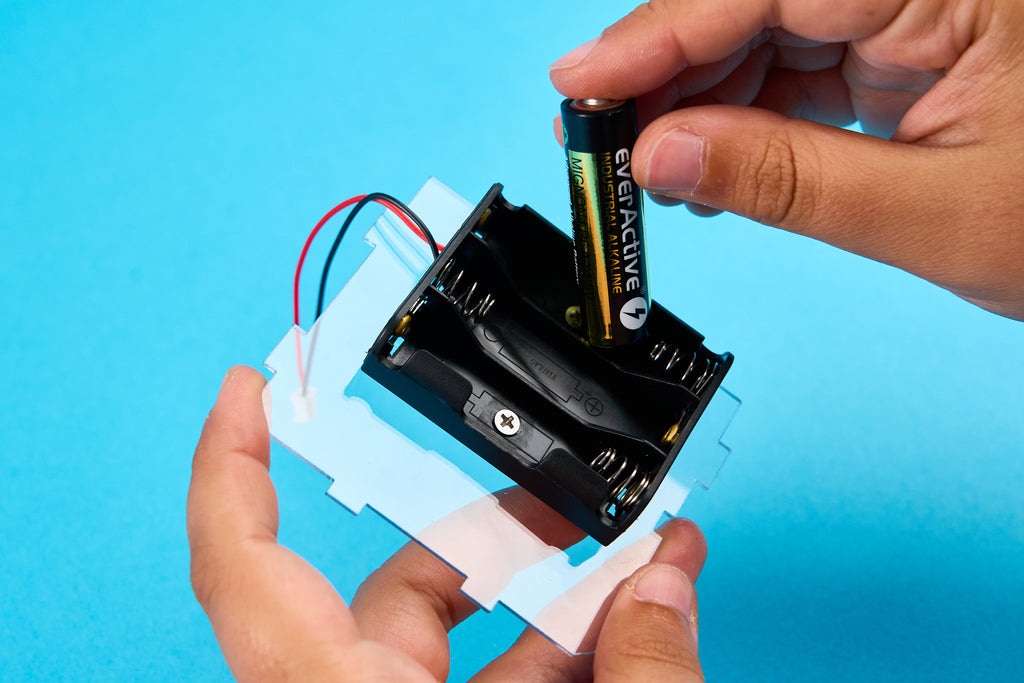
Make sure to position the battery holder just like
it is shown in the photos. This will be important
for a later step because of the wire position.

Insert a bolt through
the casings and speaker
from the outside.

Fasten the bolt with a spacer on
the backside using your hand.
Repeat this step for the remaining
three bolts and spacers.


Leave this part aside for now and focus on the battery holder..
Take the battery holder,
batteries, acrylic casing
(see the photo), two metal
screws, and two spacers.

Position the battery holder on the casing so the two holes align
with the casing’s holes.
Notice the small cut–out on one side of the casing for
the battery holder’s wire. Ensure the battery holder is
positioned so that the wire can go through that cut–out.
Insert a screw through the battery holder from the inside and
fasten it with a spacer on the backside using only your fingers.


Next, add the batteries to the holder. Be careful to put
the batteries in the right way. Inside the battery holder,
there are + and – signs indicating the correct polarity.
The same + and – signs can be found on each battery.
Leave this part aside for now.
Take the two acrylic casings (see the photo),
two small spacers, and two small bolts.

Place the smaller casing on the bigger one as shown in
the photo to ensure smooth progress in the next steps.

Insert the bolts from the side of the smaller casing
and fasten them with nuts on the backside.


Repeat this step for the
second bolt and nut.

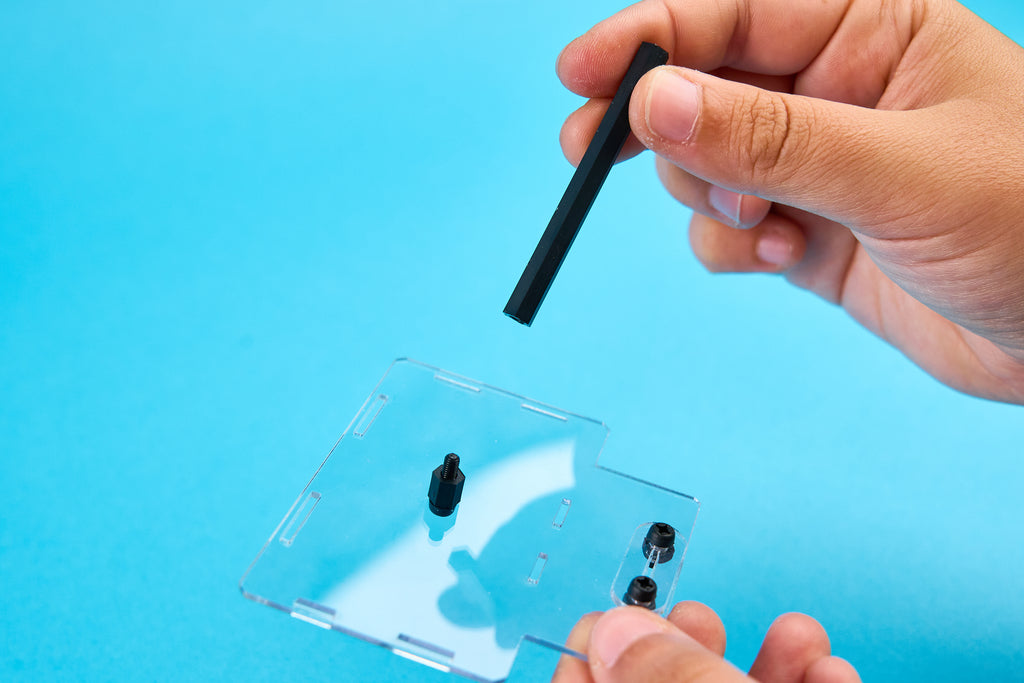
For the next step, you’ll need the
piece of acrylic you just built,
one long bolt, one long spacer,
and one medium long spacer.
Insert the bolt on the opposite side
from the previous step’s bolts.

Fasten this bolt with the medium long spacer,
and then place the long spacer on top of it.


To ensure Harald can stand on any surface without tilting,
apply the included sticky pads to each corner of the
casing after removing the whitish protective film.


Now, we can start putting Harald together!
Take the casing parts you’ve worked on previously.

Connect the battery casing and the casing with the long
spacer as shown. Ensure the battery holder is outside, and
the small acrylic part (for placing your token) is in front of it.

Bend the battery holder wire as
shown to proceed with the assembly.

Add the casing with the speaker from
the side of the battery wire. Ensure the
speaker’s wire is on the upper side.

Your Harald should look like this now.

Now for the fun and creative part!
Take all these acrylic casings: these are Harald’s
accessories—his ax, shield, arms, legs, and helmet.

Customize these casings as you wish, but be careful
to place the stickers on the right side.
Here’s a tip: to avoid messing
up, place the sticker upside
down on the table and stick
the casing to it. Ensure
it’s on the correct side.

This is what casings
look like right now.

Time to add Harald’s body!
Take all the casings with the stickers, the big casing,
PCB, nine bolts, eight spacers, and one nut.

Place the big casing on
the board, aligning all
the holes for the bolts.

Place the helmet casing
on the PCB and big casing,
and insert one bolt.

Fasten it with a spacer
from the back.

Repeat this step for the arms but BEWARE!
Right arm has to be fastened from the backside with the
nut, while the left one has to be fastened with the spacer.


Next, add the legs, shield, and ax.
Insert one of the remaining bolts and
spacers into Harald’s belly as shown.

As a final touch, we will use LEDs as his eyes.
THE NOTCHED SIDE
OF THE LED IS THE
NEGATIVE SIDE (–).
MAKE SURE TO PLACE
THE LEDS ON THE
CORRECT SIDE.
PAY ATTENTION TO
THE POLARITY OF
THE DIODES! THEY
ARE MARKED WITH
+ AND – SIGNS
ON THE PCB

How does Harald look?
Now, let’s connect everything together.
First, connect the battery and speaker wires to the
PCB so you can turn Harald on and play music.
The back of the PCB
has little signs showing
where each wire goes.


Make sure all the cut–out parts fit perfectly together.

Place the casing from the photo on the side as shown..

Finally, add the last casing and bolt at the top, and
the bolt through the big spacer in the middle.
For fastening this last bolt, you might need a screwdriver.

The big token in the kit is for connecting
to the game console Bit (sold separately)
and unlocking the secret game. If you
are not playing
a game, you
can place it in
its designated
spot next to the
battery holder.

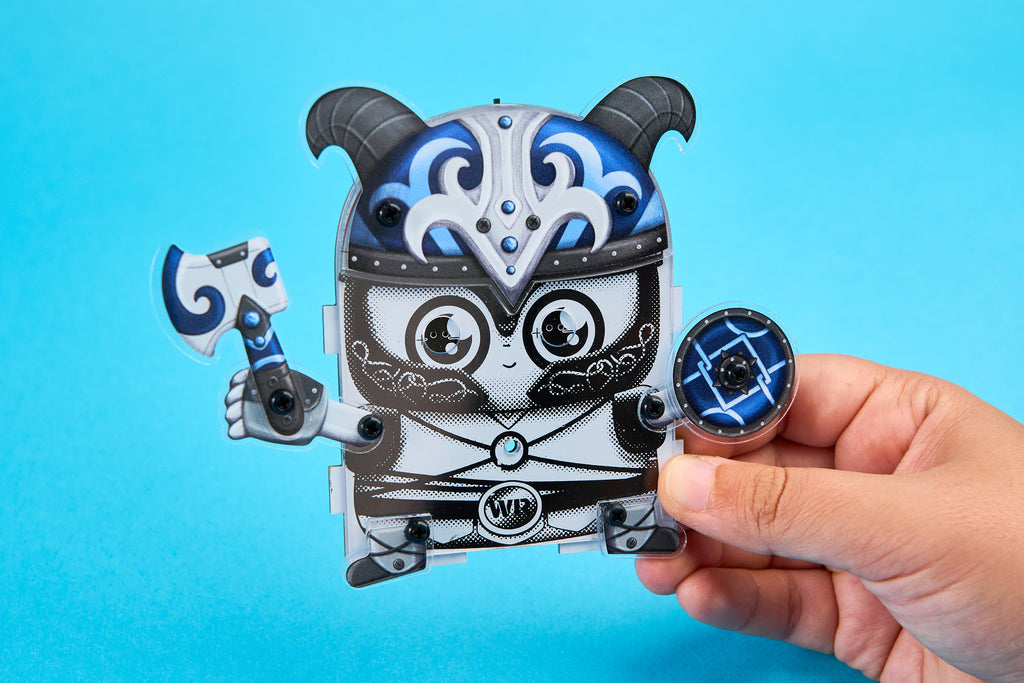
And here comes Harald! Great job—we hope
you had so much fun building your robot.

To turn it on, simply click here.

Both front and back LEDs should light up immediately.
If the front ones do not, just take them out and switch
the side—you probably mixed up the polarities.
Have fun with your new robot buddy!
The best thing about Harald is that you can connect it to your phone and play any music you want. Thanks to the speaker you connected previously, you’ll be able to hear the music very well.
TO CONNECT HARALD TO YOUR PHONE:
- Turn Harald on as shown in the previous step.
- Turn on Bluetooth on your phone.
- Find "XFW–M18" in the list of available devices.
- Connect to "XFW–M18".
- Start playing your favorite tunes and enjoy!