How to code the gyroscope-1?
Hello and welcome to the guide in which we’ll demonstrate how to code and use one of the Inventor’s modules, the blue one called the gyroscope.
To begin, connect the module to the Batcontroller and connect the Batcontroller to the PC.
Turn the Batcontroller on, and go to code.circuitmess.come.
Create a new sketch and name it “Gyroscope”.

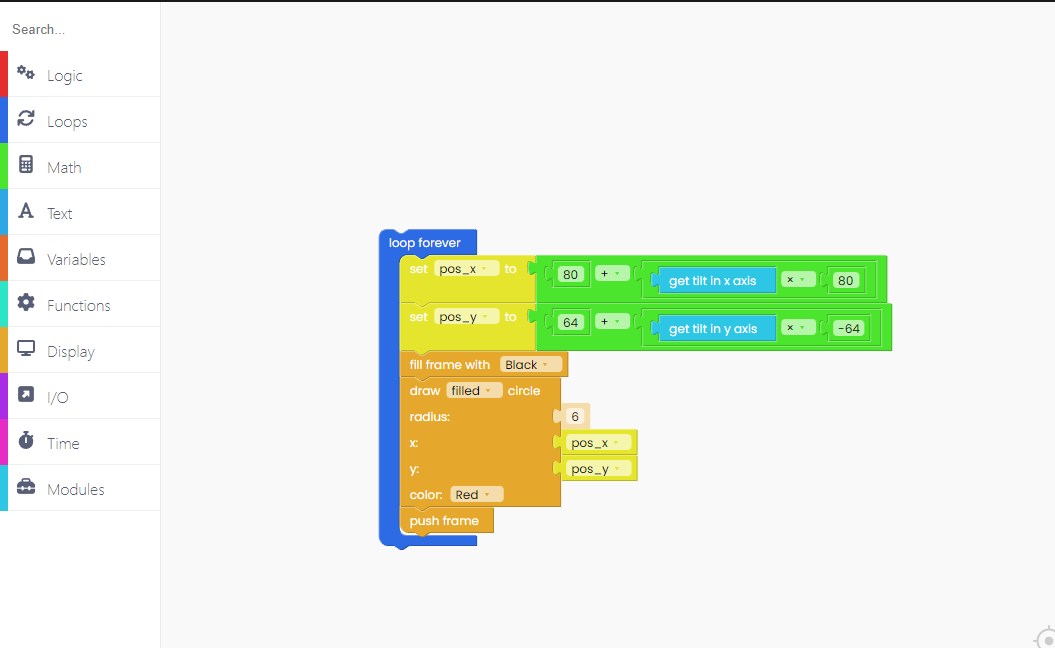
Firstly, look for the “Loop forever” block.

This block ensures that the code inside it is continuously executed over and over again.
In this block, we’ll set the “x” and “y” positions of the ball we’ll create. You do that with these yellow blocks.


Let’s add a bit of math.
It’s important to note that the display on your Batcontroller has a size of 160x128.
In the first part of this operation, we’ll use 80 to position the ball in the middle. To that, we’ll add either 80 (if we want the ball to go to the right) or -80 (if we want it to go to the left).
This block labeled “get tilt x” ranges from 1 to -1. By multiplying this value by 80, we get 80 or -80.
The same goes for the “y”. This time you have to take the number 64 since that’s half of 128.

Now we can proceed to draw the ball on the screen.
Fill the frame with any color you want, and let’s draw the filled circle.

We put the radius to 6, but feel free to experiment with different values.
The “X” and “y” coordinates should be set to the previously determined positions.
Don't forget to select the color of the ball.

And, don’t forget to include the “push frame” block. Without this block, nothing will appear on the screen.
Run the code, and start playing with the Batcontroller.