Let's play with the display!
For the next step, let's go a bit further and do something fun on display.
The first thing we are going to use are variables.
In computer programming, a variable is a storage location that contains a value. Every variable has a specific name. You can store and change the values of a variable.
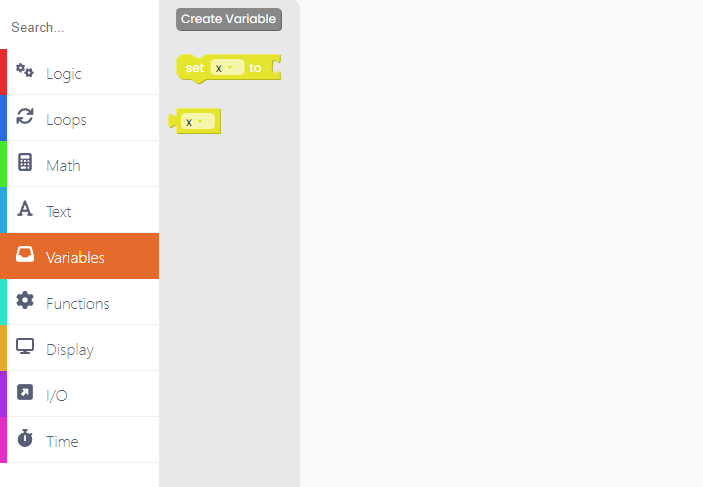
Firstly, let's create a variable. Find the section named "Variables" and press the "Create variable..." button.

You need to give your variable a name.
I am not that creative, so I will name my variable "x" (just a single letter x).

We have a variable now. Great!

We can make all the variables we will need for this sketch immediately.
Just repeat the same process you did while making the variable "x".

When we create a variable, it's undefined - it has no value. We must set a value for every variable when our computer program starts. That's why you'll need the "set variable" block.
Take the "set x variable" block and drop it into the drawing area.

You need to define the value to which you want to set the variable.
Find the block named "123" in the "Math" section. This block is a numerical value block, and you can type in the numerical value you want once you drop it onto the drawing area.
Place the block as shown in the photo below.
Now click on the block and type in the value. Set the numerical value of the block to 20. You can do this by simply typing the number 20 on your keyboard.

Now, repeat this process for every other variable you made. But, make sure to add the correct numerical value for each variable.
By doing this, we defined the position of the ball on the screen.

Look for the "loop forever" block in the "Loops" block section.

Using this block, we make sure the background of our screen is black once we run the sketch. Now, we should control the ball's motion.
Firstly, go to Variables, and choose a block called "set x to".
In addition to that block, add the math block in which we'll add the value of 'dx' to the value of 'x'.

Repeat this for the variable 'y' as well.

Let's move on to the "Logic" section!
Drag the if-do block below.

Up next, we'll need a Boolean block - the one that says "or".
Boolean is a binary variable that can have one of two possible values, 0 (false) or 1 (true).

Now we'll need a comparison block. This block is usually used for comparing the value of a variable to a fixed value (i.e., let's see if the variable x is less than or equal to number 5).
Place the variable we've created on the left side of the comparison block.
Take the numerical value block from the math section and place it on the right side of the comparison block.

Also, we have to define a numerical value of the "dx" variable, so we need to take a "set dx to" block.
Find single operand blocks in the Math section.
An operand is the part of a computer instruction that specifies what data is to be manipulated or operated on.

Now you'll have to duplicate the last couple of blocks. You can do that by clicking on the right button on your mouse and choosing "duplicate".
We'll need the second group of blocks for the "y" variable.
Check out the values we put for the "y" variable:

The hard part is done!
Let's draw the ball that will appear on the screen.
Before drawing anything on a screen, we want to fill the screen with one particular color, and for that, we'll need this block:

Now, let's draw the ball.

For the circle to appear on a screen, we have to add the "push frame" block at the end.

Finally, add the time block labeled "sleep 0 ms". Change the zero into 20.
This block determines the amount of time that'll pass before the code runs again.

Great job!
Click on the Run button and check the code.