Buzz around!
Buzz around!
Let's learn what to do with the buzzer soldered to your CircuitPet.
As the word itself says, the buzzer is used to make buzzing sounds.
We'll make a very similar sketch to the last one, but this time, pressing the buttons will trigger a particular sound to come out of the buzzer.
Let's start!
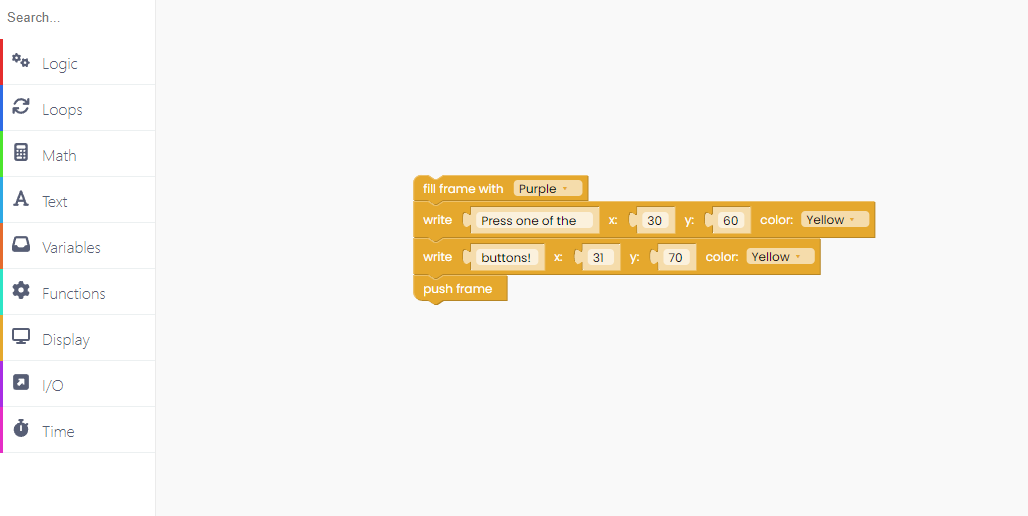
To begin with, let's write the instructions text that will appear on the screen once the code is executed.
The process is the as in the previous example.
Now that we've created a font let's change what happens with the buzzer when a specific button is pressed or released.
As in the previous sketch, we'll use I/O blocks to determine what happens when specific buttons are pressed.

Let us introduce you to a new block called "Play tone with frequency 100 Hz for 150 milliseconds".

Let's clear the display in purple once we press the A button.

You can choose what will be written on the display once the button is pressed.
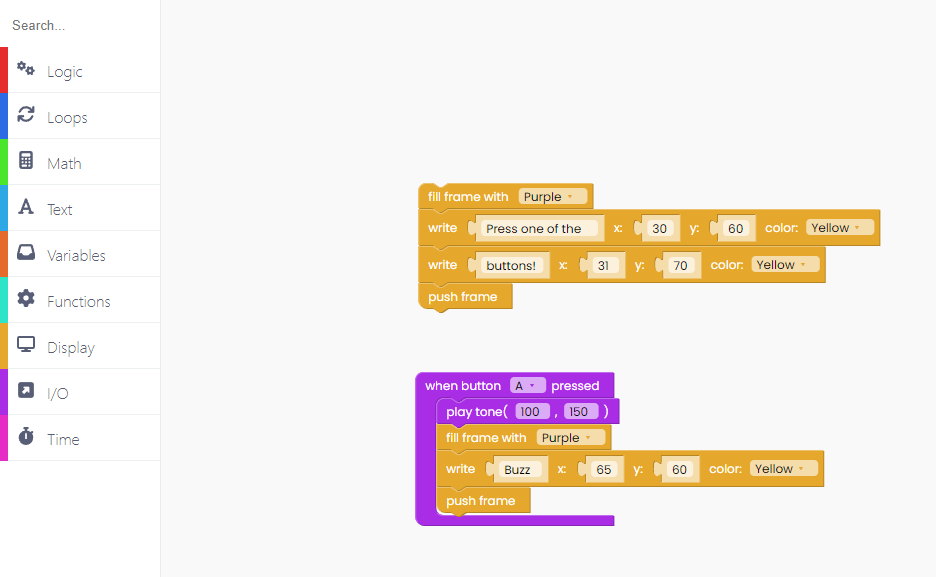
For example, the screen can say "buzz" when we press the A button.
Don't forget about the coordinates!
Let's make "x" 65 and "y" 60.
And for the end, drag the "push frame" block for a sketch to work.
First button - DONE!
Since we'll need the same blocks, we can easily duplicate them.
Let's do one button at a time.
The first one we'll do is for when a B button gets pressed. We decided to play tone with a frequency of 3000 Hz this time, and change the time to 50 ms.

The screen's color stays purple, but we'll print "Ding" this time.
Let's duplicate the block again.
Now, we'll use a right button for playing tone with a frequency of 1000 Hz for 200 milliseconds.
In the meantime, on the screen will be written "Boop". Note that we kept coordinations the same for all prints.

Yes, you guessed it right!
It's time to duplicate some more blocks.
The last button we'll use is the left one.
If you press the left button, the buzzer will play tone with a frequency of 2000 Hz for 200 milliseconds.
While the tone is playing, the screen will say "Beep".

Great! We used all of the four buttons from CircuitPet.
As always, don't forget to use the "loop forever" and "scan buttons".

Click on the Run button and hear those sounds!