Encoders
As you can see, there are many LEDs on your Jay-D.
Let's have some fun with them.
The goal of this code will be to turn the encoders left and right to light up or switch off the LEDs in a row.
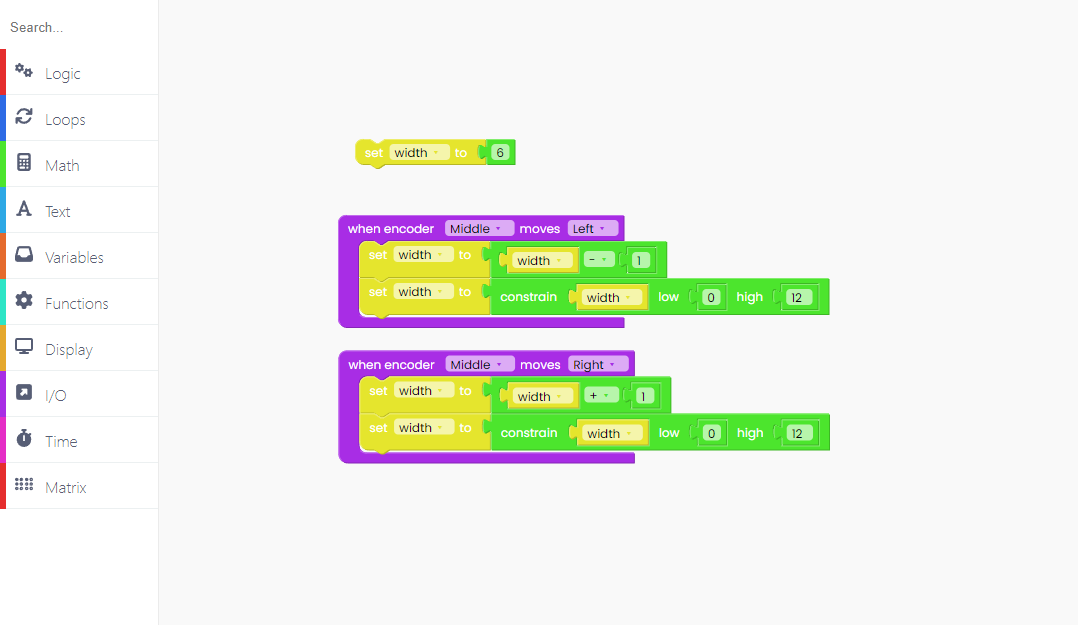
To begin, we must create the variable "width" and set it to 6.

Because we are coding the LEDs above the center slider (mid matrix), a value of 6 indicates that the variable is set to the middle.
Now, let's code what happens when we move the encoders to the left and right.
Find this I/O block:

We want the LEDs to turn off one by one when we move the encoder to the left.
We'll need to subtract 1 from the variable "width" to accomplish this.

We must also ensure that the value range is between 0 and 12, as this is the number of available LEDs.

We can duplicate this entire block and change what will happen if we turn the encoder to the right.
Make sure you're adding 1 right now!
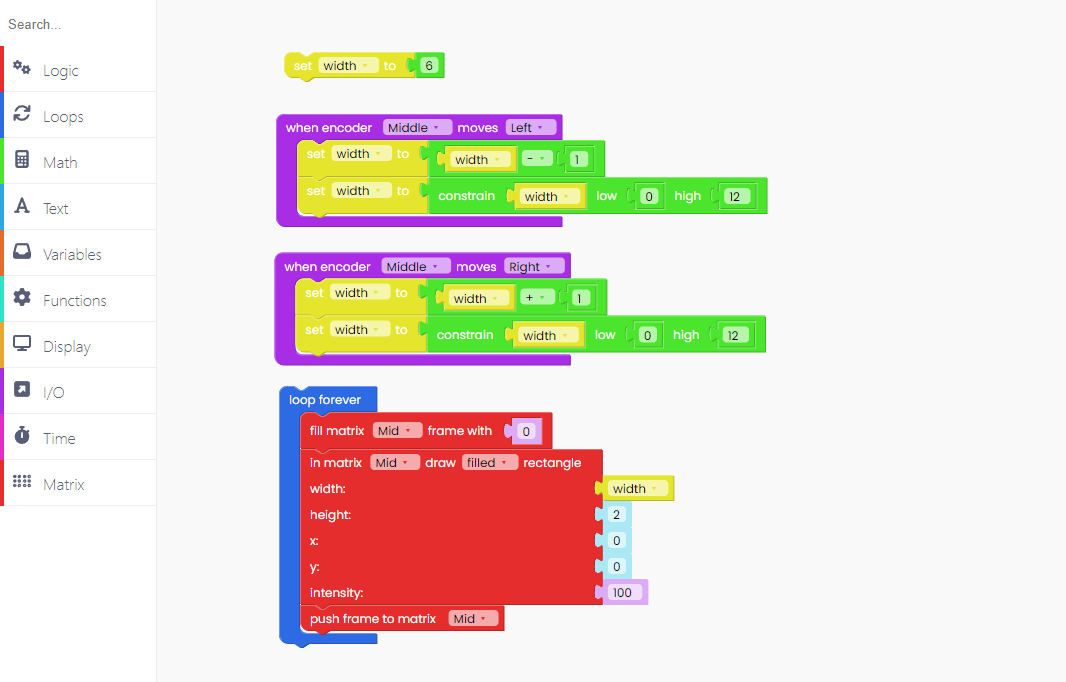
We'd like to draw anything on the LED matrix while we're messing around with the encoders.
Because that will be displayed all of the time, we must first locate the "loop forever" block from the "Loops" block part.

The first thing we want to do is turn off all of the LEDs.
This will be accomplished by locating the "fill matrix with" block in the "Matrix" block section.

Make sure to put the Mid matrix since that's the one we are working on right now.
It's time to draw a rectangle.
That block can also be found in the "Matrix" block section.
Make sure you use the correct matrix in the code.
Set the width value to the variable's value and the height value to 2.
Remember to switch on the LEDs by setting the intensity to 100.

To ensure that anything you create on the matrix appears on the screen, you must include the "push frame" block.
Another thing to remember is to always put the "scan inputs" block inside the "loop forever" block if you're coding anything with the inputs (encoders, pushbuttons, sliders, etc.).

Click on the Run button and start playing!
If you want to put the stock firmware back onto your device, you can click the Restore firmware button in the top right corner on CircuitBlocks.