Buttons
Let's write code to light the LED in the chosen color when a specific button is pressed.
This will be done mainly in the I/O block section.
Drag and drop the "When button left pressed" block from the I/O block section here:

Then, find the "set RGB LED color off" block and insert it in the block above.

Click on "off" and you'll see a drop-down menu showing you all different colors you can choose from.
For the first one, choose red.

You can duplicate this 5 times - one block for each button.
You can duplicate the block by right-clicking it and selecting "Duplicate".
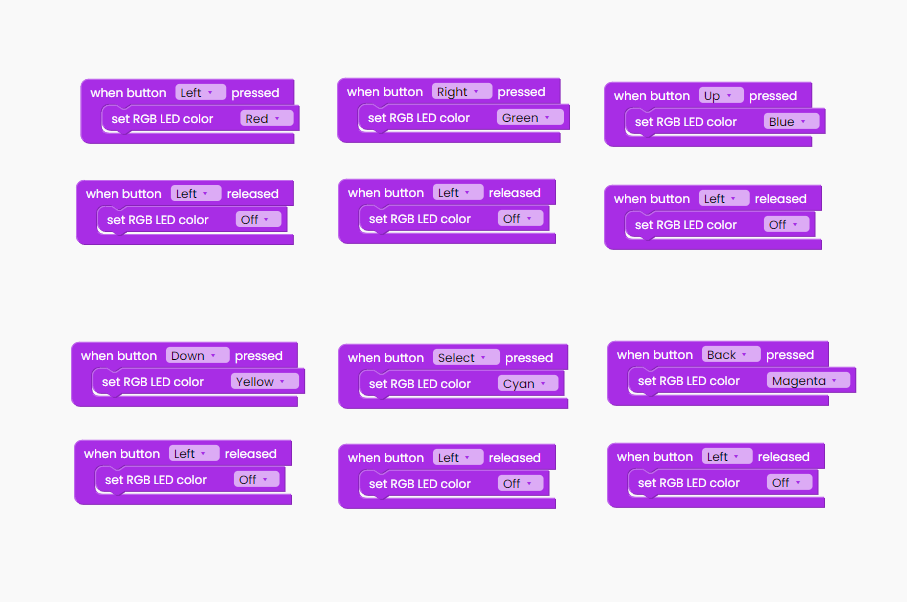
This is what your code should look like right now:

Change which button you press and which color the LEDs light up.
As a result, when each button is pressed, the LED changes color:

Return to the I/O block section and select the "When button left released" block. Drag it onto the drawing area.

As you can assume, for each button pressed action, we'll code what happens when the button is released.
Each "released" block will include the identical "set RGB LED color" block.

Let's duplicate the "released" block 5 times.
This is what your code should look like right now:
We want the LED to turn off when we release the button, so we'll keep the "off" section of the block, but we'll replace the buttons in question.

The "scan buttons" block inside the "loop forever" block is the last item we need to add. This will ensure that this action is carried out at all times.

Click on the Run button, and start pressing and releasing the buttons.