Let's get movin'!
In this chapter, we'll learn how to code your Wheelson's motors to go forward or backward, or to move the wheels in place.
This seems like a lot of work, but don't worry.
To begin, find this I/O block labeled "When button left pressed" and drop it on the drawing area.

Let's change the "left" to "up".
Now we'll code what happens to each motor when you click the button.
To do that, find this I/O block:

Make sure the speed value for this button is set to 10.
Repeat this for all four motors.

So, what we did here is we coded your Wheelson to move forward once the Up button is pressed.
Another thing we'd like to do is turn on the headlights.
For that, you'll need this I/O block:

Let's see what happens when we release the button we're holding.

We want the motors to stop and the headlights to turn off once we release the button.
Find these two blocks and place them within the "When button up released" block to do this.

Let's do it again for three more pushbuttons: down, left, and right.
When we press the "down" button, we want the Wheelson to start moving backward and that's why we need to add the minus sign before the speed value.
We also want to turn on the headlights.

We want the motors to stop and the headlights to switch off when we release the button in question.

So we coded the back and forth movement.
Let's code moving the wheels in a place.
We'll do that with right and left buttons.

We must set two of the motors to move backward and two to go forwards in order for Wheelson to move in place.
As always, turn the headlights on.
When we release the right button, we want the motors to stop working, and the headlights to turn off.

Repeat the process for the left button, but make sure to make different motors going back and forth.
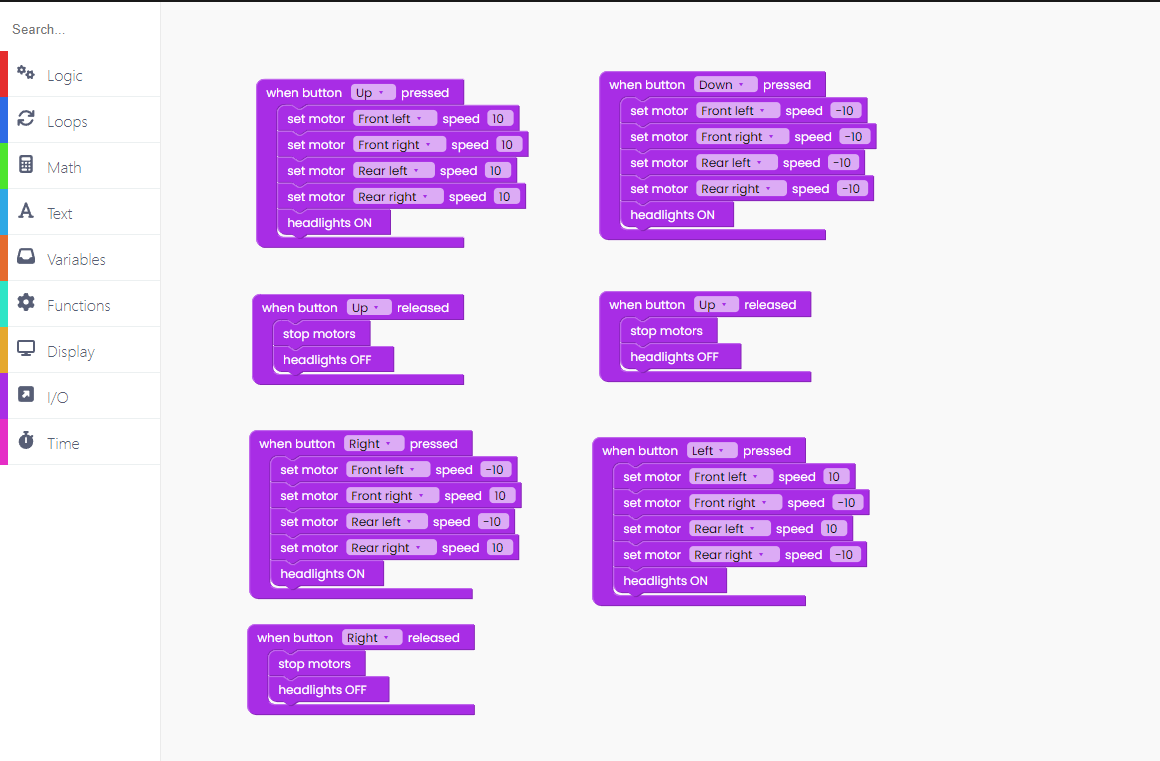
The final step is to include the block that determines what happens when the left button is released.

Finally, we must include the "loop forever" block with the "scan buttons" inside it to guarantee that the buttons are always scanned and that the code is executing properly.
Please remember to include this section every time you code something with the buttons.
Click on the Run button and try it out.