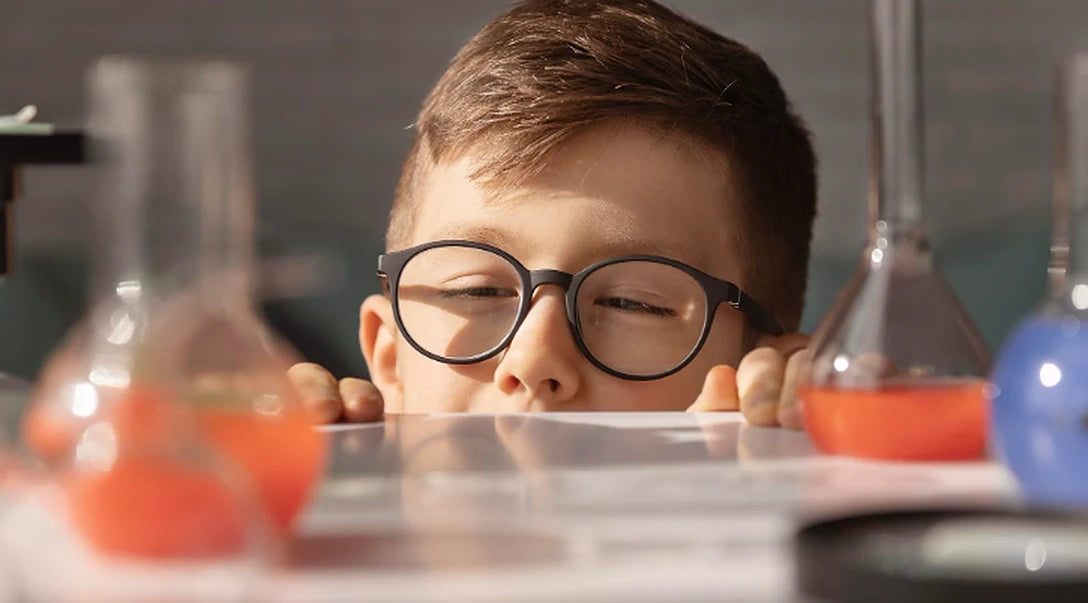
15 Cool Science Projects Your Kids Can Do at Home

Read stories how our founder Albert turned his childhood passion into CircuitMess, and get exciting DIY project ideas you can do with your kids at home for free.
Table of content
You're trying to find fun science experiments for your kids? Luckily, there are hundreds of different science projects for kids - and a lot of them can be done with just a few simple ingredients.
To help you get your kids involved in simple science experiments, we've created a list of the best science experiments for kids that can be done with ingredients you already have at home.
Almost every one of these science experiments can be finished in less than an hour (there are some lengthy ones), and the ingredients are already at your disposal.
From dish soap to vegetable oil and baking soda - these simple ingredients will help your kids learn all about the scientific method. What's even better, these easy science experiments are great for inspiring them to dive deeper into STEM sciences - and we 100% support that!
Now, without further ado, let's dive in.
Why do kids love doing science experiments?
There are several reasons why kids (and often parents) love to dive into a science experiment.
Firstly, these experiments are fun. Often, there are colorful chemicals involved, some interesting reactions can be seen, and the outcomes are surprising in most cases.
And these fun science experiments usually stoke the kids' creativity and problem-solving skills. In one of these 20 kid friendly science experiments, they'll need to either design and build something, form their own assumptions, and fix issues that may occur during the experiment.
These are perfect scenarios for young kids, where they'll learn what makes our world and how they can shape it.
The biggest reason behind this love for science projects is kids' natural curiosity. These simple at-home science experiments provide kids with opportunities to discover how things work. They'll ask you questions, they'll carefully observe what happens, and even probably come up with their own explanations.
The main point to make here is that kids are endlessly creative and curious. They only need guidelines and the materials, the rest of the magic is up to them.
How can fun science experiments help kids develop?
Engaging kids in science projects from early age can have a tremendous impact on their life skills.
Whenever there is something they don't understand, they'll question it, investigate it, do some research, and come up with their own explanations. Their imagination is unlimited, but they still need guidance. And science will help them look at the world through a different lens.
Here's what to expect if you engage your kids in science activities.
Their research skills improve
Science experiments are hugely beneficial for young kids. They get the opportunity to improve their research skills and to understand what kind of research is required for a different subject.
You may think that this mainly applies to science and other STEM fields, but it's much more applicable than that.
Well-developed research skills will help your kids master subjects like history, economics, and many other. The skill to do their own research and question their findings is invaluable.
Their creativity is fueled
Even though creativity may not be at the top of our mind when we mention science projects for kids, such experiments work wonders for broadening your kids' horizons.
Whenever they face a new challenge, they'll be able to look at the problem from a different angle, deal with a tough situation, and discover a new way to succeed.
They can think outside the box
Thinking outside the box is one of the greatest benefits of early STEM education. If a science experiment fails, kids will have no option than to look for a new solution.
This could mean starting the experiment over from the beginning or adjusting the process a bit. If they fail once, they'll try again. And if that fails, they'll give it one more go. This rinse-and-repeat process will continue as long as they don't succeed with their experiment.
Such out-of-the-box thinking and perseverance are incredibly helpful in all aspects of life, not just science experiments.
They start paying attention to details
Detail-oriented thinking is something all of us can benefit from. And by engaging your kids in cool science experiments and teaching them simple science concepts, they can develop that skill early in life.
Whether your kids are researching a new science method, experimenting with a simple science project, or learning new skills - the attention to detail is what helps them discover solutions and solve problems.
15 coolest science projects for kids to do at home
To help you and your kids get started with some of the best science experiments, we've rounded up the 15 coolest science experiments. They will help you teach kids about different chemical reactions, air pressure, and many other scientific phenomenon.
Let's dive in.
#1 Create a homemade lava lamp
Let's start with a classic science experiment. The homemade lava lamp experiment is one of the easiest one on the list - and it's a huge hit with young kids.
In this experiment, they'll learn about the density of different liquids and about some basic chemical reactions.

What do you need for this experiment?
Here's a list of tools and ingredients you'll need:
- A clear glass or a transparent container (glass jar or a drinking glass)
- Water
- Cooking oil (vegetable oil or canola oil)
- Food coloring
- Baking soda
Steps to complete the experiment
Step 1: First, set up the workplace and find a clean, flat surface you can work on. Also, be sure to place some old newspapers or a tray underneath the glass.
Step 2: ill your glass container about one-quarter full with water.
Step 3: Add a dew drops of food coloring in the glass - the color choice is up to you.
Step 4: Fill up your colored water container with cooking oil and fill it to the top. Leave just a small gap on top.
Step 5: When the colored water and oil separate, add a pinch of baking soda.
Once you do this, you'll see bubbles rising to the surface of the oil, even carrying some of the colored water to the top. Once these bubbles reach the top of the container, they'll pop and the colored water will sink back down.
This creates a simple lava lamp effect, with colorful bubbles going up and down in the container.
P.S. Try experimenting by adding even more baking soda, pay close attention to how the number and size of bubbles changes.
#2 Grow your own crystals
This science experiment is one of the sweetest ones. And that's for a good reason, since sugar is our main ingredient. The best thing about this experiment is - these crystals are 100% edible (and tasty!)
These sugar crystals will form as a result of a supersaturated solution, containing more sugar than could be dissolved in water under normal conditions. The sugar molecules, in this case, have a higher chance of bumbing into one another since there is less space for them to move around.
Then the molecules start sticking together. And if there's something these molecules can cling to, crystals will form in no time. This simple experiment is fun and the end result is edible, so - why not give a try?

What do you need for this experiment?
Here's a list of basic supplies you'll need:
- Water
- Saucepan
- Sugar
- Glass jar
- String
- Food coloring
- Straws
- Edible glitter
Steps to complete the experiment
Step 1: First, cut a piece of string that's around the same length as your glass jar. Tie one end of the string to a straw and tie a know in the other end. Get the string wet and coat in sugar. Once that is done, let it dry overnight.
Step 2: Add 4 cups of sugar and 1 cup of water into a saucepan. Heat the saucepan until water starts boiling. By heating the water, sugar will dissolve and we'll be a step closer to making a supersaturated solution.
Step 3: Stir until the sugar is dissolved, but don't heat it too much. Keep the temperature at around 100°C
Step 4: Remove the sugar from the heat and pour it into your glass jar. Add edible food coloring and some edible glitter.
Step 5: Lower the string into the glass jar and leave it for a week. Once the sugar crystals are fully formed, remove them and place them on paper towels. They'll need to dry for a few hours.
And that's it! You can now use a magnifying glass or even a microscope to inspect your crystals. Give it a shot and think about what can you see with your eyes, and what you can see with a magnifying glass.
#3 The classic baking soda and vinegar volcano
The baking soda and vinegar volcano is a classic science experiment that easily captivates kids' attention, regardless of their age. And once they see it erupt once, they'll want to do it again.
Luckily, you'll need only some basic materials and just a few minutes to prepare.

What do you need for this experiment?
To do this, you'll need just a few simple ingredients:
- Plastic cup
- Water
- Baking soda
- Food coloring (or washable paint)
- Vinegar
- Dish soap
Steps to complete the experiment
Step 1: Pour water into your plastic cup, fill it about 2/3 full
Step 2: Add 4 tablespoons of baking soda, 1 tablespoon of dish soap, and a bit of food coloring. We recommend you do this outside, since it's a bit messy experiment. Or use washable paint instead of food coloring if you'll do this inside.
Step 3: Stir the ingredients in the plastic cup and start pouring vinegar until it starts foaming.
The more vinegar and baking soda you add, the more intense the chemical reaction will be. And if you want to build something even bigger with your kids, try using clay or plasticine to build a small volcano around your plastic cup. It will look much cooler!
#4 Elephant toothpaste
Elephant toothpaste is easily one of the best science experiments for kids. They'll get to learn about catalysts, chemical reactions, and have a lot of fun doing it. Keep in mind, this science experiment requires an adult involved, since a harmful liquid is an essential ingredient.
It's a simple science experiment that requires just a few simple materials you already have at home - and one interesting liquid you'll probably need to buy.

What do you need for this experiment?
Here's a list of ingredients you'll need:
- Plastic soda bottle
- 20-volume of 6% solution hydrogen peroxide liquid
- Dry yeast
- Liquid dish soap
- Food coloring
- Plastic cup
- Safety goggles (highly recommended)
Steps to complete the experiment
Step 1: The first thing you should do is - put on some protective eyewear. Hydrogen peroxide can irritate both skin and eyes, so it should be best to avoid these problems from the start.
Step 2: Now, add 8 drops of food coloring and 1 tablespoon of dish soap into the soda bottle and mix the ingredients.
Step 3: In a separate plastic cup, mix warm water and yeast for around 30 seconds.
Step 4: Once you've done that, pour the yeast water mixture into the bottle.
And now, this simple chemical reaction takes place and the foam starts forming quickly. The yeast worked as a catalyst to remove oxygen from the hydrogen peroxide. Since a lot of oxygen was removed very quickly, a lot of bubbles appeared.
You'll notice that the bottle got really hot. This happened since this is an exothermic reaction, meaning the heat from this mixture gets released into the surroundings.
And when you're finished with this science project, you can safely pour the foam down the drain. It's made up of only water, soap, and oxygen, so there will be no harm whatsoever.
#5 The Rainbow Jar
The rainbow jar experiment is one of the easy science experiments that don't require a lot of preparation. It's great for teaching kids about different liquids, their densities, and get them interested in science activities.
The ingredient list is extremely simple and it includes mainly everyday materials you already have at home.

What do you need for this experiment?
Here's what you need for this science experiment:
- A clear glass or a transparent container (look for tall and narrow containers)
- 6 small cups
- Spoon
- Pipette
- Honey
- Dish soap
- Cooking oil
- Water
- Blue food coloring
- Purple grape juice
Steps to complete the experiment
Step 1: The first thing you should do is prepare all the liquid you'll need. Pour each one into a separate small cup. Each of them is going to represent a different layer of the rainbow.
Step 2: Start by pouring honey at the bottom of the glass. Keep in mind, there will be 5 more liquids in this glass, so don't fill up too much. Honey will serve as a red layer of the rainbow.
Step 3: Next, gently pour dish soap on the top of the red layer. For better precision, you can use a pipette, but if you don't have one at hand, it's no problem. Dish soaps come in various colors, but if possible, an orange one would work great with this experiment. the top of the previous layer, add the cooking oil. It will form a yellow layer.
Step 4: Now, pour water slowly on the top of the yellow oil layer. As you add water, be cautious not to disturb the layers below.
Step 5: Once you've poured the water, add just a few drops of blue food coloring to the wayer layer.
Step 6: Finally, pour purple grape juice on the top of the blue layer.
When all the layers are in place, you'll have a beautiful rainbow jar in front of you. This is a great opportunity to teach kids about liquid density and why some colors mix while others stay separate.
#6 Host an egg drop
This simple experiment is a huge hit with kids - and definitely one of our favorite science experiments on this list. It will help you engage your kids in a thrilling activity that challenges kids to learn about gravity, force, and even some basic principles of engineering. Overall, a great STEM activity!
In this science experiment, kids will need to protect an egg from cracking when dropped from height. It's not an easy thing to do, but it's most certainly fun and entertaining. This is a great opportunity to gather your kids' friends and have them engage in this activity together.

What do you need for this experiment?
Here's a list containing the everyday materials you'll need:
- An egg (probably a few)
- Tape
- Scissors
- Bubble wrap
- Balloons
- Cardboard
- Straws
- Sponge
- Cotton balls
- Rubber bands
Steps to complete the experiment
Step 1: Start by choosing your protective materials. You don't need to choose all of them from the list above, of course. Mix different items from the list to design a safeguard for your egg.
Step 2: Carefully place the egg in the center of your materials and start wrapping them around the egg. Make sure that the egg is well-protected on all sides (rubber bands and tape are quite useful for this.)
Step 3: And once you're satisfied with the egg armor, trim any excess materials with scissors.
Step 4: Finally, here's the exciting part. Find a space around your home (preferrably outdoors) to perform the egg drop. Now, all you need to do is - hold the egg above the chosen spot and let it go.
Now, did it crack? What worked well? What could be improved in the next try? Maybe different materials? Or better material distribution? The kids learn about engineering principles right on the spot, they'll quickly adapt, and create a better version in no time.
So, make sure you have enough of the protective materials - and enough eggs!
#7 Create Oobleck - a non-Newtonian liquid (you have the ingredients at home)
Prepare to be amazed by Oobleck, a non-Newtonian liquid that can be created much faster and easier than you'd think. It defies the laws of classical physics and for that reason alone, it's on our list of favorite science experiments for kids.
It behaves as both liquid and solid, but it's actually neither. It's one of the best hands-on science experiments for kids, regardless of their age. Even us adults get surprised when we figure out that we can create non-Newtonian fluids in just a few minutes.

What do you need for this experiment?
Here's what you'll need to create Oobleck:
- Water
- Cornstarch
- Mixing bowl
- Food coloring (if you want it in different colors)
Steps to complete the experiment
Step 1: Take a mixing bowl and fill it with water and cornstarch. If you're using 1 cup of water, use 2 cups of cornstarch. This 1:2 ratio should always be applied.
Step 2: Mix in a few drops of food coloring before combining water with cornstarch (this is optional.)
Step 3: Stir the mixture thoroughly until all ingredients are well-mixed. If the consistency seems to be too thick, add some water. Or if seems to be a bit runny, add more cornstarch.
And that's it - you've just created a non-Newtonian liquid! Notice how it works - if you apply gentle force, it will feel like a liquid. But if you try to, let's say, hit it or squeeze it, it will behave like a solid.
While it is extremely fun to experiment with, Oobleck can make things a bit messy. It's best to keep it away from carpets and other surfaces that may be hard to clean.
Also - Oobleck can be reused. Just store it in an airtight container and use it whenever you want. Oobleck shows us how science experiments can at the same time be exciting and puzzling - and that's why we love science.
#8 Set up a Rube Goldberg machine (easier than it sounds)
When we say "Rube Goldberg machine", you may think of it as a complex science experiment, but in reality, it's easier to create than you think. It involves creating a series of simple actions that eventually get combined - and trigger a fun chain reaction.
Here's just an example of what it could look like.
What do you need for this experiment?
Here's the list:
- Household items like dominoes, toy cars, marbles, balls, books, and whatever you can think of
- Cardboard ramps (or even wooden ramps)
- Tape
- A lot of imagination
Steps to complete the experiment
Step 1: Take some time to think about what you want your machine to do. It can be as complex as you like, so the best course of action is to sketch the event sequences on a paper, so you have a rough idea of how it will work.
Step 2: Gather all the materials! This is step is limited only by your imagination. Think about how each item can be used - dominoes, toy cars, marbles, books, cups, strings, tape, cardboard, wooden blocks, balloons, toy trains, popsicle sticks, plastic cups, rubber bands, kitchen utensils, balls, and so on. There's really no limit.
Step 3: Now, it's time to set up our first sequence. You'll want to look for a stable starting point first. For example, as a starting point you can use a toy car on a ramp, a marble on a track, or anything similar. And be sure to use tape to secure all items in place.
Step 4: Before you continue adding ramps, tracks, and other items to your machine, you'll need to test it. After a test run or two, you'll know what needs to be fixed, readjusted, or replaced. Tweak your sequence until it works perfectly.
Step 5: Add as many ramps, tracks, and other household items to your machine. Including more cardboard and wooden ramps will give your objects more momentum - and prolong the sequence. The chain reaction will look even more captivating.
The thing with the Rube Goldberg machine is - it can go on forever. So, take your time, build a huge sequence, and ensure each element leads smoothly into the next one.
#9 Create your own gaming consoles (it really works)
Playing video games as a kid is fun. But building your own gaming console easily tops that.
At CircuitMess, we've created various DIY kits for kids that will help them with science learning, provide them with hands-on STEM experience, and help them gain future-proof skills.
And one of our most fun projects to date is the - DIY gaming console.
Whether you're child is in elementary or middle school, this is the perfect kit for getting them interested in robotics and engineering - at an affordable price!
What do you need for this experiment?
For this cool project, you'll need to have:
- CircuitMess Nibble parts and components
- Desoldering vacuum tool (optional)
- Multimeter
- Solder wick
Unlike with the previous experiments, this one requires a bit more serious equipment. Still, it's easily accessible and you can get all the essentials directly from us in the DIY gaming console bundle!
Steps to complete the experiment
Building your Nibble gaming console is a complex process, but an enjoyable one.
There are many steps required, so to help make it easier, we've created a build guide for our gaming console.
Visit the link and find out everything you need to know.
#10 Build a robot from scratch
Does building a robot sound cool enough? We're absolutely sure it does!
Wacky Robots are one of our coolest DIY kits for kids aged 7 and above. This simple DIY kit will help teach your kids about electronics and build confidence to tackle other challenges with persistence and tenacity.
This is the perfect hands-on experiment for any kid - there's no previous knowledge or experience required. And you can get all the required parts, components, and guides for $29.99.
There are various Wacky Robots in our DIY subscription, and each month, your kids will get a new science project to complete. So, each month, your kids will have the chance to learn about different aspects of science, engineering, and electronics.
Plus, it's incredibly fun.
What do you need for this experiment?
To assemble your robot from scratch, you'll need to get the Wacky Robots DIY kit - and that's it! You get all the parts, tools, and components in the box.
Steps to complete the experiment
There are several steps to building a Wacky Robot. At this moment, we're shipping out DUSTY, a beginner-friendly robot kit that will teach kids about electronics and photoresistors.
To make the entire process easier, here's a step-by-step tutorial on how to build DUSTY!
#11 Magic milk
Unlike the previous two, the Magic Milk is a bit easier one, and definitely one of the classic science experiments for kids.
It's great for teaching kids about chemistry basics and surface tension - and it looks really cool once it's finished.
Let's take a look at what kind of supplies you'll need.

What do you need for this experiment?
For this experiment, you'll need:
- Milk
- Dish soap
- Food coloring
- Small bowls
- Cotton swabs
- A tray or a shallow container
Steps to complete the experiment
Step 1: Pour milk into a shallow tray or container and make sure it covers the bottom evenly.
Step 2: Add a few drops of different food coloring to the milk (combine various colors to create a more vibrant effect - i.e. blue, yellow, and red food coloring will do the trick)
Step 3: Dip a cotton swab into the dish soap.
Step 4: Gently touch the surface of the milk with the cotton swab.
Step 5: Repeat as many times as you like.
You'll notice that the food coloring will start to move and swirl around, creating stunning patterns. Now, how and why does this work?
Milk contains fat molecules that naturally repel water, so when you add the dish soap, the surface tension of the milk breaks and fat molecules scatter around the container. As the soap touches the surface, it affects the surface differently in each spot.
And just a tip - if you want a more magical effect, try using 5-6 different colors - or even try using complementary colors.
#12 The Skittles experiment
This is one of the easy science experiments for kids - and one of the sweeter ones.
It's a great way for them to learn about solubility and it's simply entertaining, as colors mix on the plate in a magical way.
Toddlers and preschool kids will surely enjoy this one and it takes just a few minutes to perform.

What do you need for this experiment?
Here are all the simple supplies you'll need:
- Skittles candy of different colors
- A white dish plate
- Warm water
- A stopwatch
Steps to complete the experiment
Step 1: Arrange the Skittles candy in a circle on your white dish plate. Mix different colors to get a more vibrant effect in the end.
Step 2: Pour warm water over Skittles until they are covered in water. Be careful not to add too much water.
Step 3: Track time with your stopwatch and look at how Skittles begin to dissolve in the water and spread outwards.
Now, why does this work?
It's incredibly simple. The colored sugar dissolves in water and as the water level rises - colors blend together and create a beautiful rainbow pattern.
#13 Egg and vinegar experiment
This fun experiment will teach your kids about the power of acids and their ability to dissolve calcium carbonate, the main ingredient of eggshells.
Let's go through everything you need to know!
And before we start, check out the image below. On the left, you can see what the egg looks like when the experiment is finished.

What do you need for this experiment?
Here's the list of ingredients:
- A raw egg
- White vinegar
- Transparent container or a clear glass
- A timer
Steps to complete the experiment
Step 1: Place the raw egg gently into the clear glass and make sure it's fully submerged.
Step 2: Pour white vinegar over the egg until it's completely covered.
Step 3: Set a timer to track progress of this experiment. Let the egg sit in the glass for the next 24 hours. After some time, you'll notice that bubbles are forming around the egg (that's carbon dioxide!)
Step 4: Carefully remove the egg from the vinegar in the glass, so you don't break it. Hold it in your hand and feel the difference - it may even feel rubbery. Now, gently rinse the egg under running water to wash off any remaining vinegar.
What's the science behind this super easy science experiment? While vinegar is an acidic solution, the eggshell is mainly composed of calcium carbonate. When these substances come into contact, a chemical reaction occurs, releasing carbon dioxide in the form of bubbles.
This is why the egg gets a bit softer and rubbery, since its primary eggshell component gets broken down.
#14 Create a sundial in your backyard
This is an extremely simple, but clever science experiment for kids where they will learn to tell time just like the ancient civilizations did! It's a great way to get your kid interested in astronomy and timekeeping - and it's fun predicting where the shadows will move throughout the day.
Luckily, you won't need a lot of materials to create a sundial in your backyard - the sun plays the most important part.

What do you need for this experiment?
Here's what you'll need:
- A sunny day
- Flat surface in your backyard
- Stick
- Small rocks
- Clock for reference
Steps to complete the experiment
Step 1: Find the perfect, flat spot in your backyard where the sun shines throughout the day.
Step 2: Insert the stick into the ground at that spot and make sure it's firmly fixed and standing straight.
Step 3: Use your clock to tell the current time and mark the shadow cast by the stick at the moment. This is your starting point.
Step 4: Return back to the sundial at regular intervals (every hour) and mark the new positions of shadows cast by the stick.
Step 5: Connect the marked positions of shadows with the stick by drawing a line. Write down what time it was for each position of the shadow.
Once you've done all this, you'll be able to tell time simply by looking at the stick in your backyard. And here's a quick tip - your sundial is the most accurate at noon, so noon could be a great starting point for this experiment.
#15 The Doppler Effect project
The Doppler Effect experiment is perfect to get your kids interested to explore sound and its numerous properties.
This phenomenon affects the pitch of sound waves when a source moves relative to an observer. It's a great way for kids to learn how sound behaves and why.
And the ingredient list for this easy science experiment is incredibly short, so there's really no barrier to start.

What do you need for this experiment?
Here's the list of things you'll need:
- A whistle or a toy siren
- 2 meters long rope (approx. 6 feet)
- A parent to oversee and help
- Timer
Steps to complete the experiment
Step 1: Find the appropriate place for this experiment - somewhere open, where you can walk or run without any hindrance. If you have a larger background, it'll be perfect.
Step 2: If you're the parent helping with the experiment - go stand in one spot while holding the whistle or a toy siren. Your kid will observe sound, while you'll be the source.
Step 3: Get your kids to stand approximately 10 feet from you and then blow the whistle. Your kids will need to take notice of the sound and how loud is it.
Step 4: Now, take your whistle and start moving away from the kids while blowing the whistle continuously.
Step 5: Start moving back towards the kids and ask them to interpret what they've heard - how the pitch of the sound changes as the source approaches or moves farther away.
Step 6: Use a timer to note how long it takes for the pitch of the sound to change as you move away and back towards the kids.
Now, what's the science behind this simple experiment?
The Doppler Effect is a phenomenon that occurs when a sound source is moving relative to an observer. The closer the sound source is to the observer, the more compressed the sound waves get and the pitch is higher.
And it works vice versa. The farther the source moves away from the observer, the more stretched the sound waves get, resulting in a lower pitch.
Bonus science experiment: Build a Batmobile (it’s the real deal)
All science experiments we've gone through in this post are cool in their own way - but none as cool as the CircuitMess Batmobile. if you're wondering - once you build it, you can control it with the Bat Controller or even program the Batmobile to drive autonomously.
How cool is that?!
And there's no need to worry if this will be too complicated for your kids. We've designed the Batmobile so kids aged 7 and above can easily assemble it.

What do you need for this experiment?
We've made sure that everything you need is in the Batmobile kit. So, once you get the kit, you'll have everything you need to assemble the Batmobile.
Steps to complete the experiment
To get it done, you'll need to both assemble it and code it.
This is a great opportunity to teach kids about coding and get them interested in engineering.
And to make this process so much easier, we've created separate build, code, and usage guides.
Check out the video below to see exactly what kind of adventure awaits you.
CircuitMess STEM box is everything your kid ever wanted
Science experiments offer kids exciting journeys of discovery and fuel their curiosity and imagination. From magic milk and sugar crystals to lava lamps and Rube Goldberg machines, each of these easy science experiments nurtures your kids' problem-solving skills.
But your kids are ready for even greater challenges.
This is where CircuitMess comes into play. We've created the most exciting thing a young kid could ever want - the STEM box. It's a treasure trove of DIY STEM projects that will help your kids become comfortable with coding and engineering.
Find out what kind of awesome projects wait for you and your kids in our STEM box - and find the one that best suits your kids' interests. Wanna build a music mixer and a sound sampler? Or building a robot car sounds more interesting?
We've got you covered. Your kids' potential is endless, and we're here to help you unlock it!
Read stories how our founder Albert turned his childhood passion into CircuitMess, and get exciting DIY project ideas you can do with your kids at home for free.
Read more

STEM Kits for Autistic Tweens and Teens: Structured Building, Real Results
For autistic tweens and teens who love systems, the best STEM tools ar...

STEM Kits for Kids with ADHD: Why Hands-On Building Works
Hands-on STEM building kits work with ADHD brains rather than against ...

Robotics Classes vs Robotics Kits: What $300 Actually Buys Your Kid
A typical kids' robotics class runs $25–75 per session and your kid ke...